13. Implement Multi-device Formation for EP by Using the RoboMaster SDK
This document uses the Windows 64-bit operating system as an example to illustrate how to implement EP formation by using the RoboMaster SDK.
13.1. Demo environment requirements and materials checklist
- Programming environment
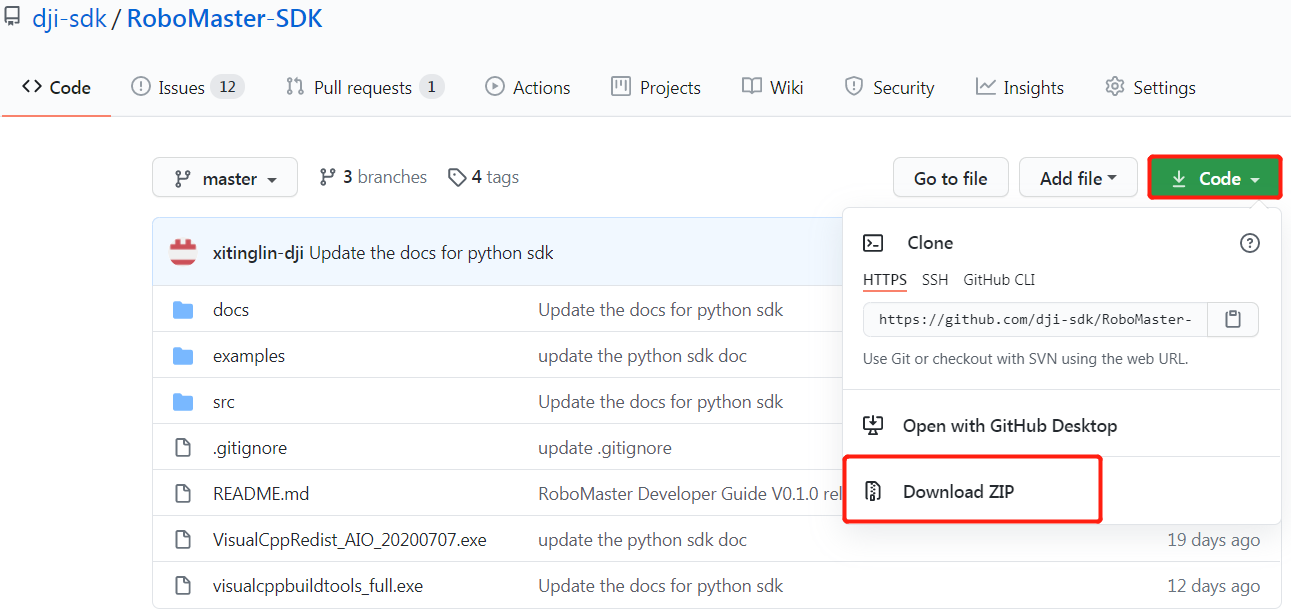
- Download the RoboMaster-SDK compressed package from GitHub at RoboMaster-SDK compressed package (alternative Gitee download address: RoboMaster-SDK compressed package) by completing the following steps:
- Click
Codeand thenDownload ZIPto download the compressed package.
- Decompress the downloaded RoboMaster-SDK-master.zip compressed package:
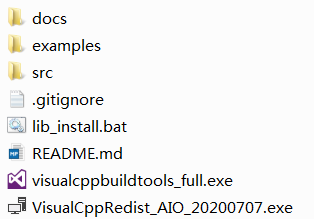
The compressed archive contains the following files:
- The VS-related runtime library: VisualCppRedist_AIO_20200707.exe
- The VS build tool: visualcppbuildtools_full.exe
- RoboMaster SDK sample code: examples
- The third-party library installation script: lib_install.bat
- Install the required VC library:
Run VisualCppRedist_AIO_20200707.exe in the decompressed RoboMaster-SDK archive and complete the installation:

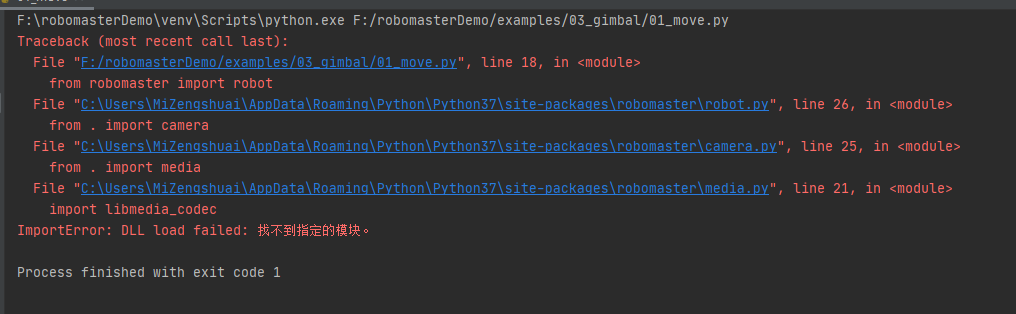
警告
The following error occurs if you use the SDK without installing the VC library:
- Install the VS build tool:
Run visualcppbuildtools_full.exe in the decompressed RoboMaster-SDK archive and complete the installation:

- Installation process in Python:
- Locate the Python installation package on the Python official website (Python 3.7.8 in this example) and download the installer in the package.
警告
Ensure that the downloaded python.exe file is for 64-bit installation and the Python version is 3.6.6 or later. Otherwise, you cannot use the Python SDK properly due to compatibility issues. If you have already installed Python on your PC, we recommend that you uninstall it and install the required version.
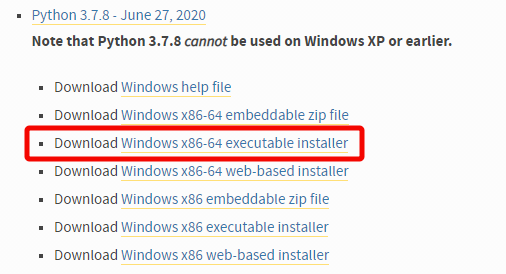
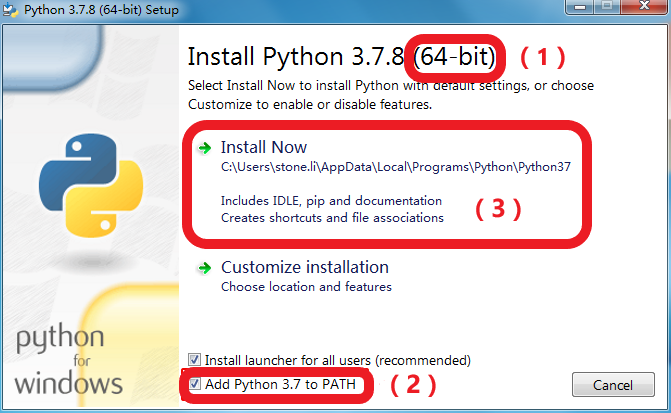
Step 1: Check that the installation package is for
64-bitinstallation, otherwise you cannot use the Python SDK properly.Step 2: Select
Add Python 3.7 to Path.Step (3): Select ``Install Now’’ to begin installation, as shown in the figure below:
- After the installation is complete, press the
Win+Rshortcut command, entercmdin the window that appears to open the CLI, and then enter ``python’’ on the CLI to confirm that Python 3.7.8 has been installed successfully.

Install the dependent Python third-party library:
Method 1: Locate the lib_install.bat file in the downloaded RoboMaster-SDK archive (
RoboMaster-SDK-master/lib_install.bat), right-click the file, and select “Run as Administrator”.Method 2: Install RoboMaster SDK, click the start menu on your PC, and enter
cmdin the search box. In the search results, right-click the CLI program and selectRun as Administratorin the menu that appears. Then, enter the following commands in sequence:pip install robomaster pip install netaddr pip install netifaces pip install myqr
- EP vehicles
- Quantity: 6 EP infantry vehicles
小技巧
If you do not have 6 EP vehicles, use 2 EP vehicles. In this case, replace the rest of the code by referring to /examples/15_muti_robot/multi_ep/02_two_ep_demo.py.
- Firmware version: 01.01.0500
小技巧
You can upgrade the firmware version in the RoboMaster app to ensure that the firmware version is 01.01.0500 or later.
13.2. EP networking connection
Step 1: Set the network connection method of each EP robot to networking and add the PC and the robots to the same LAN for networking,
as shown in the figure below:
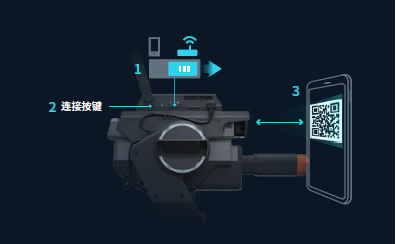
Step 2: Generate a QR code
- Refer to the example in the sample code directory of
/examples/01_robot/05_sta_conn_helper.pyin the downloaded and decompressed RoboMaster-SDK archive.
1 2 3 4 5 6 7 8 9 10 11 12 13 14 15 16 17 18 19 20 21 | import time
import robomaster
from robomaster import conn
from MyQR import myqr
from PIL import Image
QRCODE_NAME = "qrcode.png"
if __name__ == '__main__':
helper = conn.ConnectionHelper()
info = helper.build_qrcode_string(ssid="RoboMaster_SDK_WIFI", password="12341234")
myqr.run(words=info)
time.sleep(1)
img = Image.open(QRCODE_NAME)
img.show()
if helper.wait_for_connection():
print("Connected!")
else:
print("Connect failed!")
|
警告
In line 13 of the sample code:
info = helper.build_qrcode_string(ssid=”RoboMaster_SDK_WIFI”, password=”12341234”)
Replace ssid (the router name) and password (the router password) with the actual name and password.
Run the sample code to display the QR code. Then, press the scan button on the smart central control of the robot, and scan the QR code to connect to the network.
Execution result:
Connected!
The light indicator of the robot changes from blinking white to solid turquoise.
注解
A total of 6 EP vehicles need to be connected to the Wi-Fi hotspot. When connecting the 6 EP vehicles one by one for the first time, repeatedly run the sample code to connect to each vehicle. After successful connection, the vehicles will be automatically connected upon the next startup.
13.3. Run the sample code for multi-device formation
- Refer to the example in the sample code directory of
/examples/15_muti_robot/multi_ep/03_six_ep_demo.pyin the downloaded and decompressed RoboMaster-SDK archive.
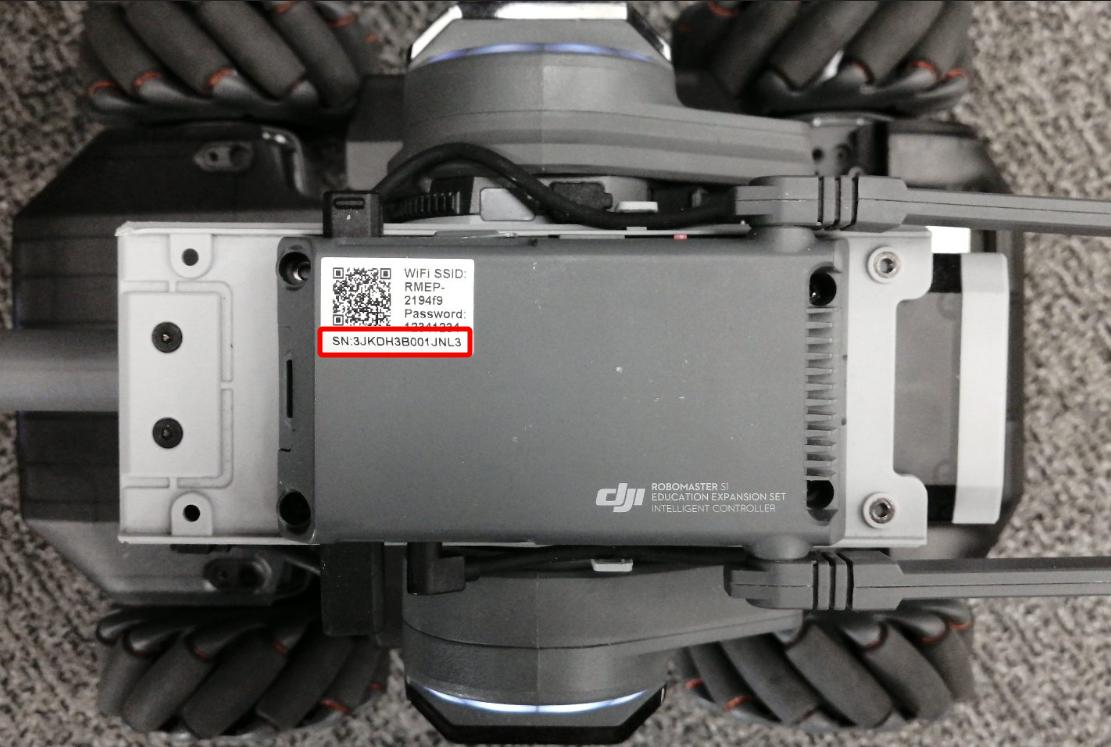
- After each robot is successfully connected to the same router, you need to manually change the robot SNs in the sample code. The SN of each robot can be found on the label of the smart central control, as shown in the figure below:
Edit the sample code and locate line 203:
1
2
'3JKDH3B001M8MW', '3JKDH3B001PQ53', '3JKDH3B001470C']
Change the SNs in the sample code based on the actual SNs of the robots.
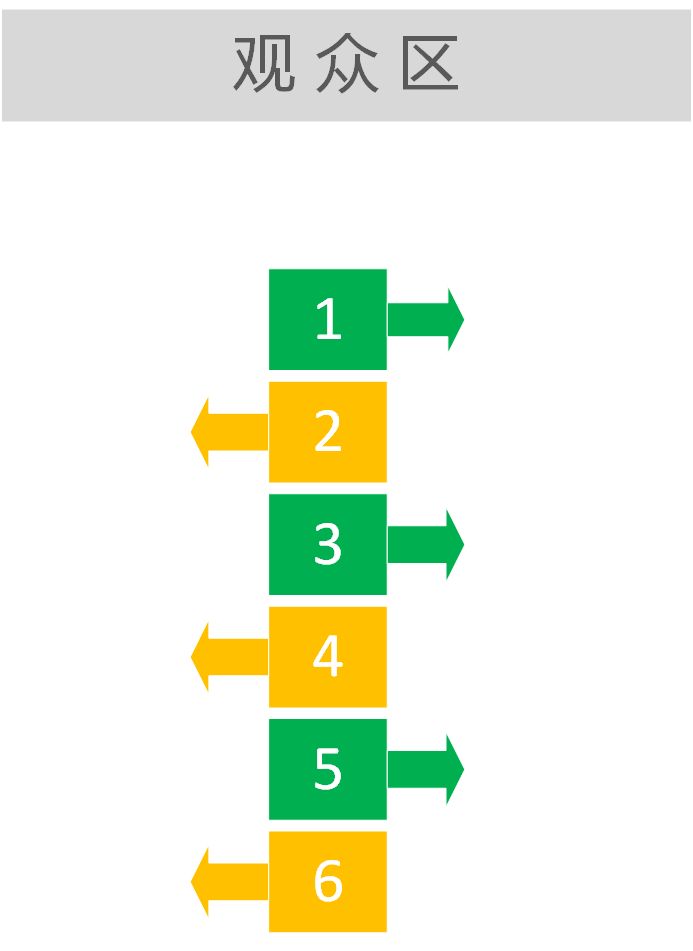
According to the order of the six SNs, place the six robots in sequence as shown in the figure below. The direction of the arrow is the direction of the robots.
13.4. Run the modified sample program
Go to the: file:/examples/15_muti_robot/multi_ep/ directory, press and hold the Shift key, right-click any blank area in the directory, and then select “Open Powershell Window Here” or “Open Command Window Here”.
Run the code and enter the following in the command window::
python 03_six_ep_demo.py